MODULE #1 | LESSON #3
How to install your signs
In this lesson, Ruben will demonstrate step-by-step how to install your window sign.
Step-by-Step Photo Demonstration
Supplies Needed:
Razor Blade
Masking Tape
Window Sticker

-
1
Make a cut about 15 inches from the right of sticker. From the back side... See next image.

-
2
I have already made a cut here as mentioned in previous image.
-
3
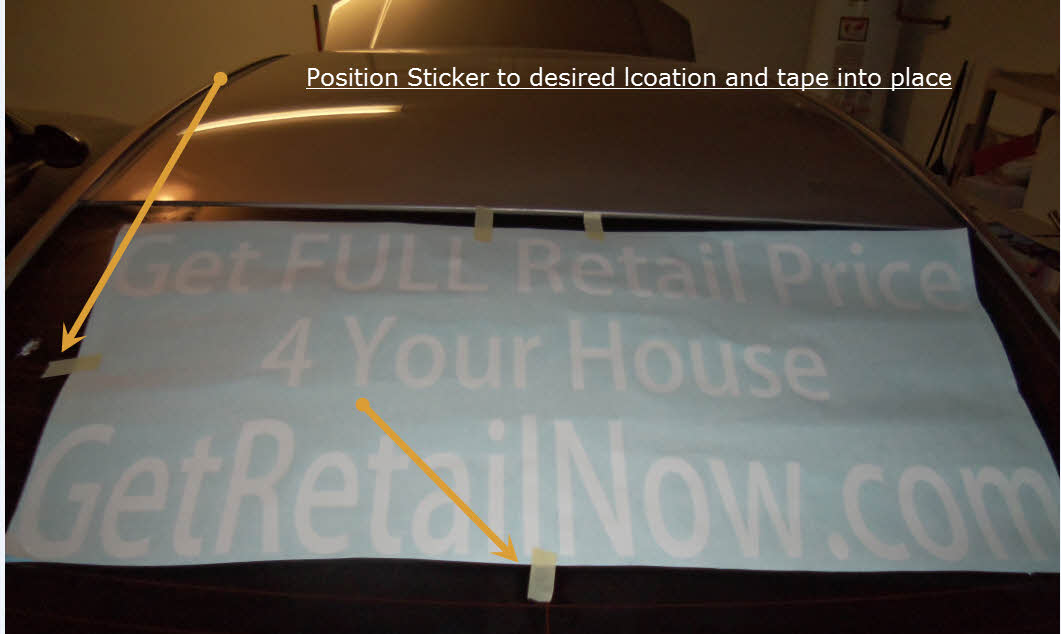
Position sticker into desired location and place tape

-
4
Lift and remove backing.

-
5
Now begin to roll a bit at a time to avoid air pockets.

-
6
Roll back toward you one letter at a time to avoid air pockets.

-
7
Now on to the other side...
-
8
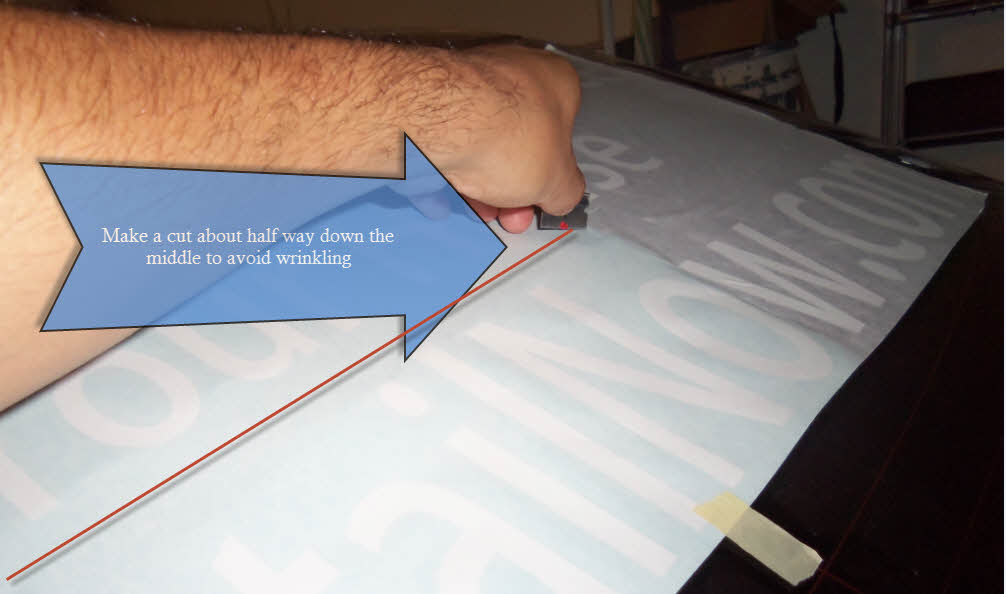
Make a cut halfway down the middle to avoid wrinkling.
-
9
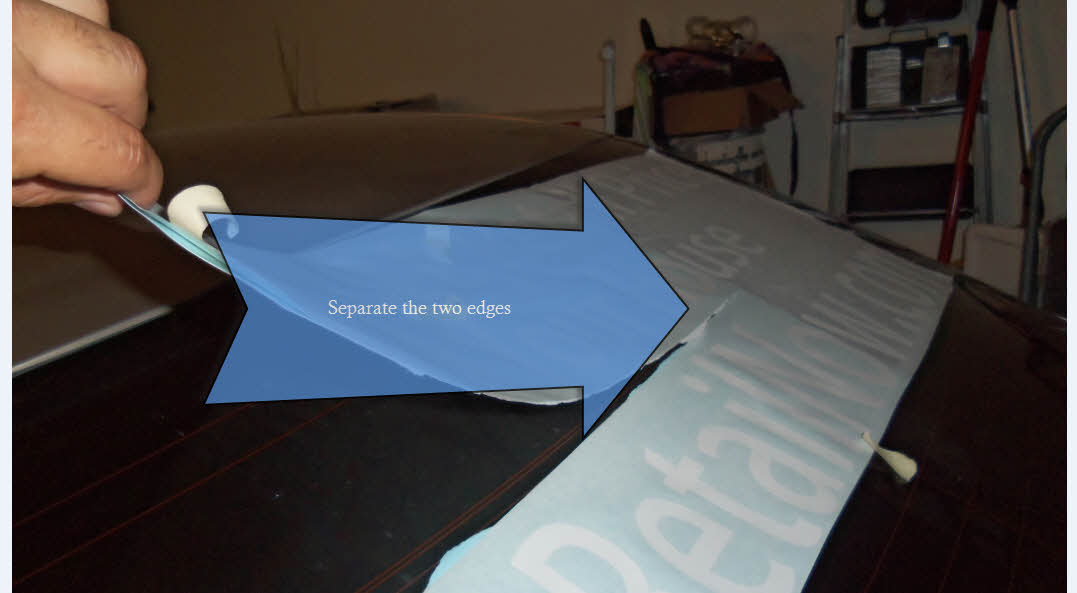
Separate the two edges.
-
10
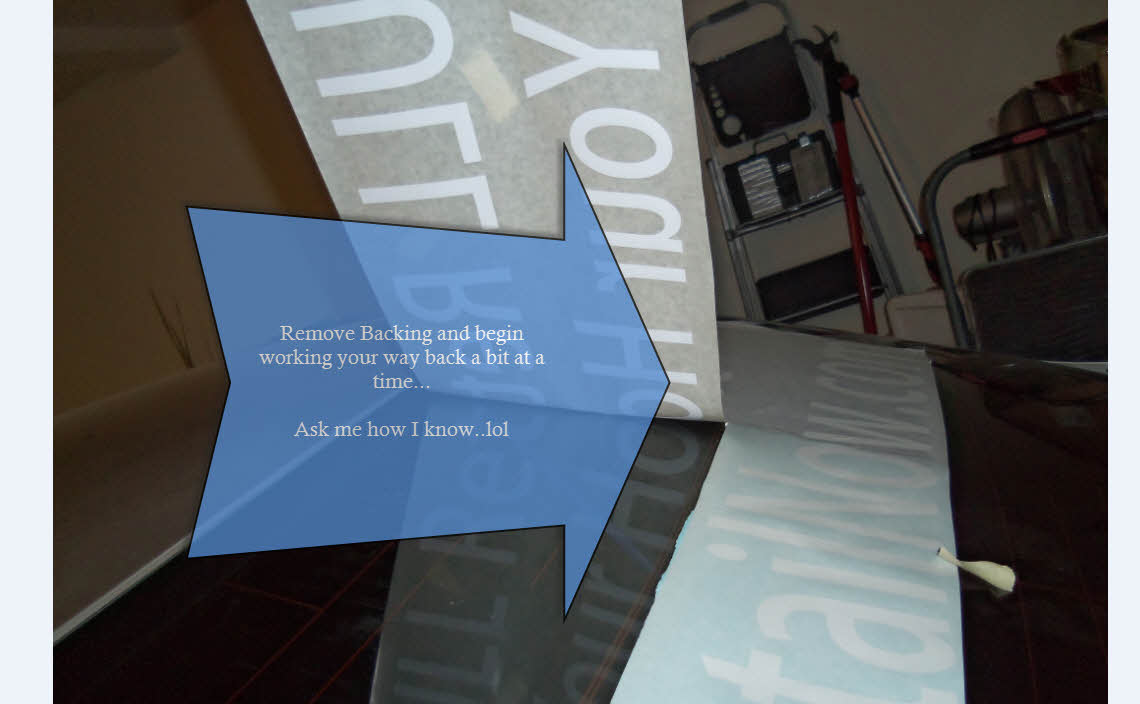
Remove the backing and begin working your way back a bit at a time.

-
11
Now on to the bottom half...
-
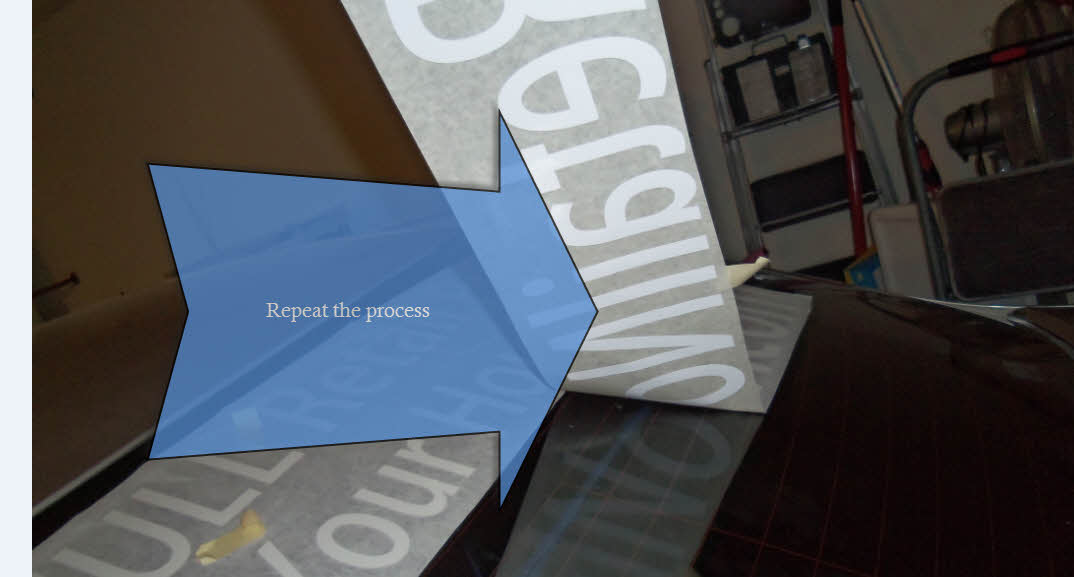
12
Repeat the process
-
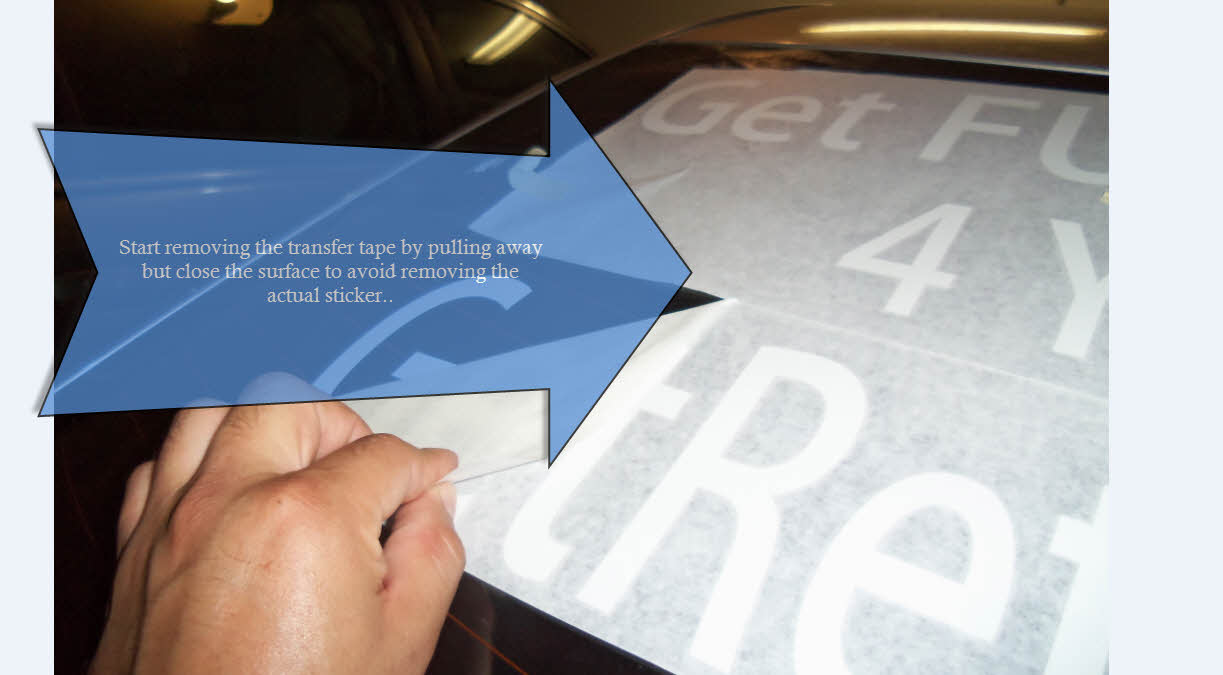
13
Start removing the transfer tape by pulling away but close to the surface to avoid removing the actual sticker.

-
14
Do it in sections or it can get ugly... you only get one shot.
-
15
Remove the last bit of backing material and you are all done.